Friday, June 29, 2012

More party favors

Just wanted to post these projects.....
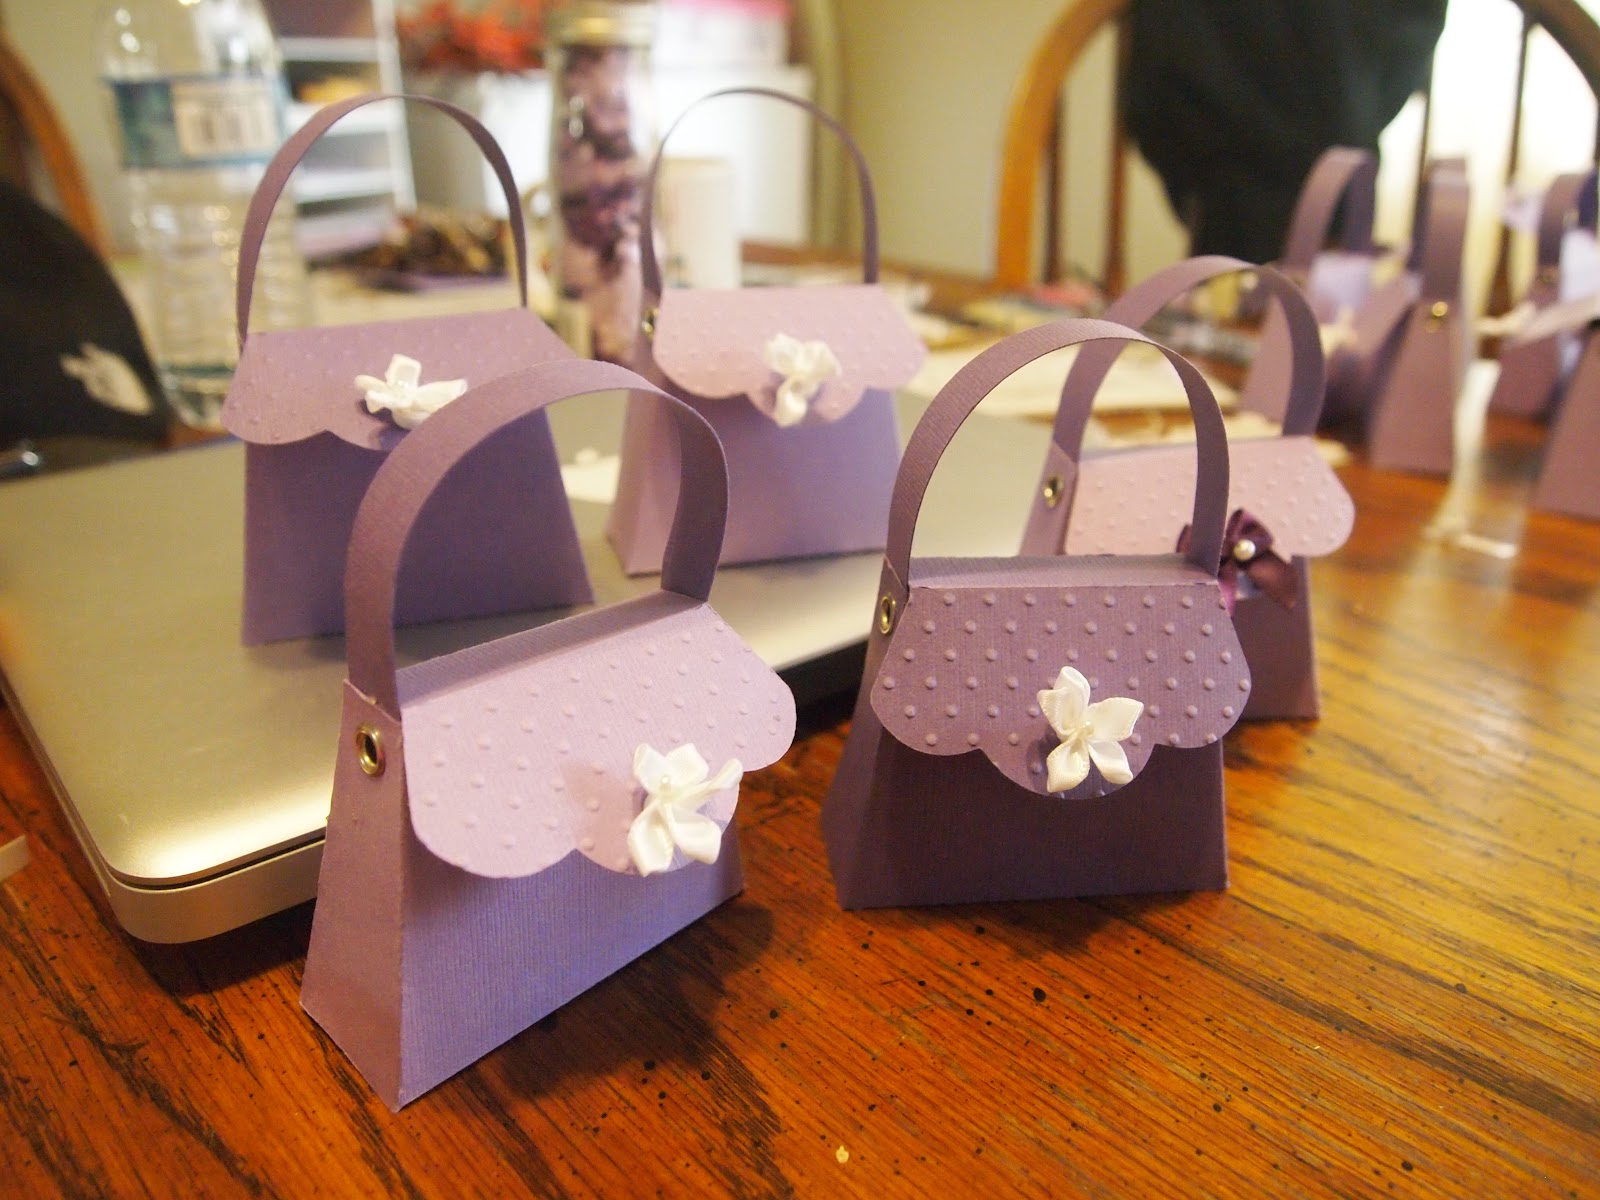
Made 100 of these for a Sweet 16. Had a heck of a time keeping the sides together.  Nothing I used work - ATG, 2-way glue...finally used some tacky tape and that worked until I ran out.  Ended up running around like crazy cause I was short on time but then found some great tape, similar to scor-tape and that saved the day...
Here are a few more pics..

I embossed all the flaps with the swiss dots cuttlebug folder. 

These last favors were used for my daughter's baby shower.  I have to admit I was a little sloppy when attaching the printed ribbon.  Again, short on time!
 Made 24 of these...
Another close up
Favors spread out across the table....

I also made some table decorations for a friend for her daughter's baby shower, I'll post those pics at a later time.  Gotta run now...
Thanks for stopping by!
Sending you crafting wishes,
Jeanette


Tuesday, May 29, 2012

Baby Shower Onesie

Wow! It's been too long since my last post...hopefully I'll be able to share more once summer vacation begins in a few more weeks.  Now onto my latest project, made 75 invitations for a friend.  She's hosting a baby shower for her daughter. The theme is ladybugs.  I had hoped to do something with more ladybugs on it but was unable to replicate the ideas I found online...

This was my final product ~


Here's a close up

Onesie was cut using CCR, it's from the New Arrival cart.  It measures about 4.5in. I did all the wording on Microsoft Word and after I assembled the onesie, I taped it to a blank sheet of paper using painter's tape and ran it through my printer.  It took long but I was happy with the outcome.  The buttons on the bottom were made with the Viva Decor paint.  Some are all red, some all white and a few had a combination of both colors.  The ladybug is a puffy sticker. 

Well this is all for now....if you stopped by ~ I thank you!!
Linking this up to Celebrate the Occasion: Challenge #64. It's an 'anything goes challenge'. Come join the fun...you have until June 3rd....

Sending you crafting wishes,
Jeanette

Sunday, April 8, 2012

Very Hoppy Easter

Just stopping by to show you pics of the Easter bags I made for my two beautiful grandsons...

Here's a closer look...shapes are all from the CCR Basic shapes 
 .
and the carrot is from Create a Critter cartridge. I added some waxed twine for the whiskers and used my white gel pen on the eyes...
 I made the carrots from Teresa Collins' Bunny and Chicks digital cartridge...
They were very easy to put together...I added yellow grass and some candy and just closed them shut with curling ribbon...These were for my kids...ages range from 14 to 21...no need for baskets for them...they just want the candy!

Well this is all for now..hope you had a wonderful Easter...I sure did! Thanks for stopping by!

Sending you crafting wishes,
Jeanette

Saturday, April 7, 2012

Cropping Weekend

Hello my crafty friends, it's been a while since I've posted anything ...keeping myself busy with different projects...
Recently, I had the pleasure of participating in my first cropping weekend.  I had a great time...joined a great group of women, which included two of my cousins.  We stayed at the Hudson Valley Resort..the weather was great the entire weekend...There was inspiration everywhere I turned...While I took lots of things with me, I didn't get much accomplished...especially because I didn't take any pictures with me...I didn't do much the first night, brainstormed a little because I had promised my daughter that I would work on baby shower invites....even though I was surrounded by many beautiful layouts, ideas were slow to come but eventually I did get one and started to cut all my pieces with the two cricut machines that were available to us...Aside from this, there were 3 make and takes that I completed but I haven't photographed them yet...those will come soon...

Here's a picture of the giraffes I cut, the theme is jungle..I didn't take any pics of the final invite but my daughter did send me a picture taken with her cell phone..


I created these with create a critter cartridge, 25 in total...I'll be making a banner and a few more things soon...

Well this is all for now...thanks for stopping by and have a blessed Easter!

Sending you crafting wishes, 
Jeanette

Monday, March 19, 2012

Birthday bash

Well, as I previously promised..here are the pics from my grandson's 1st bday party.

Here are the invites...all cardstock is from American Crafts - Primary colors.  They measure about 4.5 all around....
Characters are from the Bump in the Night cartridge.  I alternated the colors for the invites and the monsters.  Information is printed on white copy paper and washi tape is on the bottom. 
This is by far my favorite character and I'm upset with myself for not taking a better picture when I had the chance, this picture below is courtesy of my cousin who was kind enough to snap pics of the day while I entertained the guest.
He measures 23in. in length and about the same in width.  I used my gypsy to cut him and split the image in two.  The idea was to play "pin the eye on the monster".  I used random scalloped circles that I had and put the child's initials on it.  Of course, everyone was a winner.  This little fellow here is my cousin's son and he was so super happy when he placed his 'eye' in place...I think this was my favorite part of the day....
I can't remember what cart I used for the banner but the letters are from the Don Juan cart. They are cut at 5in. I love this font...the "1st" is cut with Alphalicious and measures about 10in. in length, the word "birthday" is from 'Create a Critter' and it spans about 23in. in width.

Now for the party bags, I cut 3 of each character.  The idea was to have the kids match their monster to their party bag and to their drawing space.  The largest was cut at 5 in. because it was supposed to be part of their party hat but once the kids were here, we decided that putting it on a string and hanging it around their neck worked better for matching purposes.  These are some of the characters, laid out on the table so that each guest could pick their monster.

Here's how they looked on the party bags

I stamped Thank you  on the bottom of each bag before filling them up with goodies.
 Close ups of the bags.  The aunt of the bday boy, my oldest daughter, did all the faux stitching....
The image on the bags was cut at about 3.5 inches and so was the image that was placed in each child's designated drawing area.  I don't have any pics but I placed 11x17 white copy paper with a monster on it, on the wall in random spots around the house and every guest had to find their matching monster and draw a picture.  Again, it was a great hit with the kids.

On the cake, I placed an extra monster I had because the cake was a plain one and we couldn't get the sprinkles to stick to the sides without risking dropping the cake.
I had planned for a few more things like monster toppers for the cupcakes that were served and drawing the monsters with Cricut markers on several sheets to make a small coloring book for the kids but ran out of time. 
Now one last pic...
The bday boy stuffing his face with a mini cupcake...he really enjoyed it! 

Well, if you made this far...a big thank you...I know it was long...
Thanks for stopping by!
Sending you crafting wishes,
Jeanette